
If you are finishing a new room, one question can slow the whole painting project: how many coats of primer on new drywall are actually needed? In most normal situations, one full and even coat of a quality drywall primer is enough before applying finish paint. A second primer coat is not automatically better. It becomes useful when the first coat leaves uneven absorption, visible repairs, missed areas, or an inconsistent surface. New drywall needs primer because bare drywall paper and joint compound absorb coatings differently. Without proper sealing, the finished paint can look patchy or uneven. Primer helps create a more consistent surface for the topcoat. However, good results depend on much more than simply counting coats. Surface preparation, primer choice, application thickness, drying conditions, sanding quality, and the final paint all matter. This guide explains when one coat works, when two may be justified, and how to prepare new drywall for a professional-looking finish.
How Many Coats of Primer on New Drywall Are Usually Needed?
For properly finished new drywall, one complete coat of drywall primer is usually the practical starting point. The goal is not to build a thick layer. It is to seal the porous surface and reduce differences between drywall paper and joint compound. Manufacturer guidance supports using dedicated primers to seal new drywall and create a uniform base for the finish coat. The exact number can still depend on the product and wall condition, so always follow the primer label. If you are wondering how many coats of primer on new drywall after a normal installation, plan for one proper coat first. Let it dry fully, then inspect the entire surface under good lighting. If the wall appears evenly sealed and no problem areas remain, move to your finish paint. If patches remain unusually porous or inconsistent, correct those areas before painting. A second full primer coat should solve a specific problem rather than become an automatic step.
Why New Drywall Needs Primer
Fresh drywall may look smooth and uniform from across the room, but its surface contains different materials. The exposed face paper covers most of the wall. Joint compound covers seams, fasteners, corners, and repaired areas. These materials do not necessarily absorb paint at the same rate. If finish paint goes directly over them, the differences may remain visible through changes in color, texture, or sheen. That is why how many coats of primer on new drywall is closely connected to surface uniformity rather than simple coverage. A drywall primer helps seal the surface so the finish paint behaves more consistently. Sherwin-Williams describes drywall primer as a product that seals new drywall and helps produce a uniform, consistent finish. Proper priming can also help the topcoat develop more evenly. Primer cannot repair poor drywall finishing, though. Deep scratches, ridges, pinholes, torn paper, and poorly sanded joints should be fixed before primer is expected to hide them.
Why One Coat Is Often Enough
A quality primer applied at the manufacturer’s recommended coverage should not be judged by whether it makes the wall look like a finished painted surface. Primer has a different job. On clean, dry, correctly prepared drywall, one uniform coat can seal the substrate and prepare it for finish paint. USG’s primer instructions, for example, call for a full-coverage coat on a sound, dry, clean surface. The company also requires drywall joints, fasteners, and accessories to be properly treated before priming. This helps explain how many coats of primer on new drywall are needed under normal conditions. If preparation is good and the product is applied correctly, one coat can do the sealing job. Applying extra coats simply because some joint areas remain visually noticeable through primer may waste material. Instead, determine whether you are seeing a color difference, an actual surface defect, or uneven absorption. Those problems do not always have the same solution.
When a Second Coat of Primer May Help
Two primer coats can make sense when the first application does not create an acceptably uniform sealed surface. This may happen after extensive patching, repairs, unusual porosity, poor initial coverage, or major differences between surface areas. A second coat can also help when the first coat was unintentionally applied too thin. If you are deciding how many coats of primer on new drywall after inspecting the first coat, focus on performance rather than appearance alone. Look for areas that still absorb differently, obvious missed sections, or repaired zones that behave unlike the surrounding wall. Before adding more primer, make sure the problem is not poor sanding or damaged drywall paper. Primer will not flatten a raised joint or remove sanding grooves. Some high-build primer-surfacers are designed to minimize minor drywall fuzz, grooves, nicks, and pinholes, but even those products have limits. Repair meaningful defects first, then prime as directed.
Drywall Paper and Joint Compound Absorb Differently
Understanding porosity makes primer decisions easier. Drywall consists largely of gypsum enclosed by paper facings, while finished joints contain layers of joint compound. After sanding, the wall can look visually consistent but still contain surfaces with different absorption rates. Finish paint applied directly over those differences may dry unevenly. This can create a condition often described as flashing, where joints or repaired areas appear different from surrounding sections under certain lighting. When considering how many coats of primer on new drywall, remember that the purpose of the first coat is to reduce these differences. A suitable drywall primer is formulated for this job. More finish paint is not always the best substitute because finish coatings are designed primarily to provide final color, sheen, washability, and protection. Starting with a uniform sealed base gives those coatings a better chance to perform as intended. Good preparation and primer application therefore work together.
Preparing New Drywall Before Primer
Preparation can matter more than applying an unnecessary extra coat. New drywall should already have properly finished seams, covered fasteners, and completed corner work. Joint compound and patching material must be thoroughly dry before sanding and priming. Sherwin-Williams recommends sanding dried joint cement and patching material smooth, wiping away the dust, and then priming. A dusty surface can interfere with the finish and leave grit beneath the coating. When deciding how many coats of primer on new drywall your project needs, do not count on primer to correct unfinished preparation. Inspect the wall from several angles with strong side lighting. Look for raised edges, scratches, pinholes, dents, torn paper, and visible fastener problems. Repair them before the main primer coat whenever possible. Once repairs are dry, sand carefully and remove dust without damaging the paper surface. A smooth, clean wall gives primer a much better foundation.
How to Remove Drywall Dust Correctly
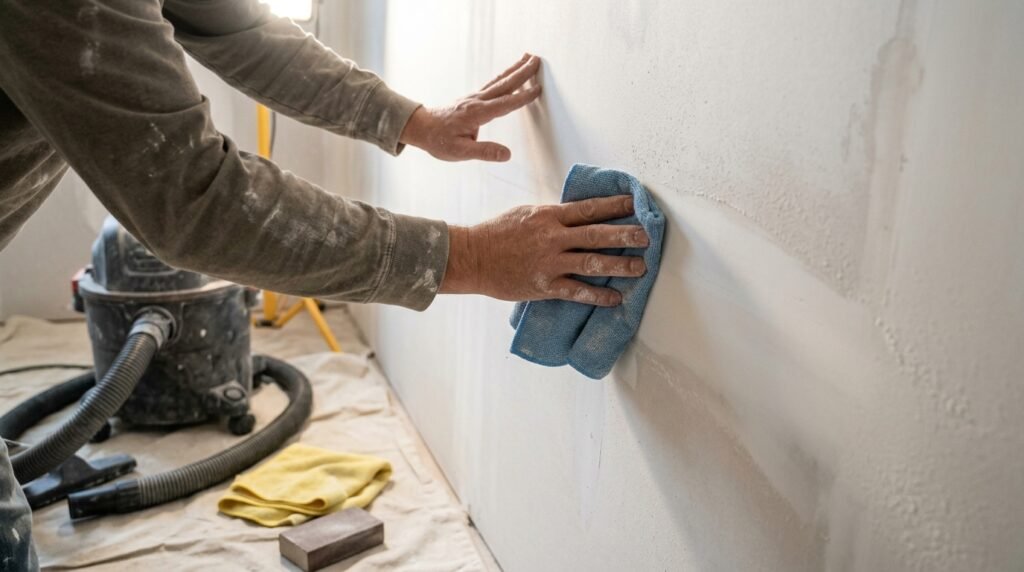
Drywall sanding produces very fine dust. Leaving a heavy layer on the wall can compromise your painting results, so dust removal deserves time. Start by vacuuming loose dust from floors, corners, ledges, and nearby surfaces. Use a suitable vacuum setup and avoid simply blowing dust around the room. For the walls, follow the recommendations for your finishing and coating products. A clean microfiber cloth or other appropriate dust-removal method can help remove remaining residue without soaking the drywall. Bare drywall should not be saturated with water. The answer to how many coats of primer on new drywall will not matter much if the first coat is applied over a thick layer of loose sanding dust. Pay extra attention to horizontal edges, electrical-box areas, corners, and repaired sections. After cleaning, use a bright work light to check the surface again. Dust can hide small scratches and pinholes that become more obvious after primer dries.
Choosing the Right Primer for New Drywall
A dedicated drywall primer or PVA drywall primer is a common choice for bare interior drywall. Sherwin-Williams describes its PVA drywall primer as suitable for new residential bare drywall and says it helps provide a uniform topcoat appearance. The company also offers higher-build products for surfaces with minor imperfections. Product selection should match the wall condition and intended finish. This affects how many coats of primer on new drywall may be required because primers differ in solids, hiding, sealing ability, recommended film thickness, and recoat instructions. Do not assume every white primer performs identically. Read the technical data and container label before application. Some primers are made mainly for new drywall, while others focus on stain blocking, adhesion, high build, or multiple substrates. If the drywall has unusual stains, damaged paper, or another special problem, a basic PVA product may not be the best solution. Match the primer to the actual condition.
PVA Primer vs. General-Purpose Primer
PVA drywall primers are designed specifically for porous new drywall and similar interior surfaces. They are commonly used in new construction because they provide an economical way to seal bare drywall before painting. A general-purpose interior primer may cover a wider range of substrates and may offer different adhesion or stain-blocking properties. Neither category is automatically best for every project. For ordinary clean new drywall, a drywall-specific primer is often a logical choice. If you are asking how many coats of primer on new drywall while choosing between products, read each manufacturer’s application instructions rather than applying a universal rule. A premium wall primer, stain-blocking primer, high-build surfacer, and basic PVA primer can behave differently. You should also consider your topcoat. Glossier finishes and strong side lighting can expose surface imperfections more readily, so preparation quality becomes even more important. The primer cannot compensate for every flaw in drywall finishing.
Primer Is Not a Substitute for Joint Compound
A common DIY mistake is trying to fix surface defects by rolling on more primer. Standard drywall primer is not joint compound. It cannot properly fill deep scratches, poorly feathered seams, large pinholes, dents, or damaged corners. If you can feel a ridge with your hand before priming, extra coats are unlikely to make it disappear. This distinction is important when answering how many coats of primer on new drywall because a rough wall may need repair rather than another coating. After the first primer coat, defects can actually become easier to see. That is useful. Mark problem areas, make appropriate repairs, allow them to dry, sand them smooth, remove dust, and reprime repaired bare areas as needed. Certain high-build primer-surfacers are formulated to reduce the appearance of minor sanding grooves, paper fuzz, nicks, and pinholes. However, they still should not be used to hide major finishing errors that need proper drywall repair.
How to Apply Primer With a Roller
For most DIY rooms, a brush and roller provide a practical application method. Begin by protecting floors, trim, fixtures, and anything that should not receive primer. Stir the product according to its instructions. Cut in around corners and edges with an appropriate brush, then roll the larger areas. Work in manageable sections and maintain a wet edge when possible. When thinking about how many coats of primer on new drywall, remember that one properly applied coat is more useful than a patchy coat followed by random touch-ups. Use the roller nap recommended for your wall texture and coating. USG’s published primer guidance, for example, specifies professional roller covers within a stated nap range for smooth and semi-smooth surfaces. Your product may differ, so check its instructions. Load the roller adequately without creating heavy runs. Spread primer evenly instead of pressing hard to squeeze every drop from the roller.
Rolling vs. Spraying Primer
Both rolling and airless spraying can produce good results when done correctly. Spraying is fast for large empty spaces, which is why it is common in new construction. However, proper equipment setup, masking, ventilation, spray technique, and coating thickness matter. An inexperienced user can apply an uneven or overly thin coat very quickly. Rolling is slower but gives many homeowners more control. If you are calculating how many coats of primer on new drywall, do not assume a sprayed wall always needs more or fewer coats. Judge the actual film and follow the product’s specified coverage. Some professional workflows spray and then back-roll to help create a consistent surface texture and application, depending on the coating and project requirements. Airless equipment also operates under very high pressure and requires appropriate safety practices. If you have never used a sprayer, a roller may be the simpler choice for a single room.
How Long Should Primer Dry on New Drywall?
Drying time varies by product, temperature, humidity, ventilation, and film thickness. Never use one universal time for every primer. Check the container and current technical data. Some drywall primers allow recoating fairly quickly under normal conditions. Sherwin-Williams states that its PVA drywall primer can allow recoating in as little as one hour, while actual conditions can extend drying. USG has also documented primer drying around an hour under specified normal conditions, with cold temperatures or high humidity slowing the process. Drying time is relevant to how many coats of primer on new drywall because applying another coat or finish paint too soon can create problems. A surface that feels dry in one spot may not be ready everywhere. Corners, heavier areas, and poorly ventilated rooms may take longer. When uncertain, allow more drying time and follow the manufacturer’s recoat guidance rather than rushing the next step.
Should You Sand Primer Before Painting?
Light sanding after primer can improve smoothness when the product and project allow it. Primer may raise small paper fibers or make tiny imperfections more visible. A gentle sanding can remove minor roughness and dust nibs before finish paint. However, aggressive sanding can cut through the primer and expose bare drywall again. If that happens, those areas may need additional primer. Your decision about how many coats of primer on new drywall should therefore account for what happens after sanding. Use fine abrasive material appropriate for the coating, apply light pressure, and follow product recommendations. Remove sanding dust before painting. If the first primer coat reveals a significant defect, do not simply sand the primer harder. Repair the underlying drywall properly. Some drywall primers are specifically promoted as easy to sand, which can be useful when a particularly smooth final surface is desired.
What Should a Properly Primed Wall Look Like?
A primed wall does not have to look exactly like a finished wall. The surface should appear consistently sealed without obvious missed areas, runs, heavy ridges, or large changes in absorption. Some variation in color or visibility beneath the primer does not automatically mean the primer failed. Hiding and sealing are related but different functions. When checking how many coats of primer on new drywall are necessary, inspect the wall in normal room light and with a strong side light. Run your hand gently across suspect areas. Look for physical defects rather than focusing only on whether the wall is perfectly white. If the primer has created a sound, even surface and the drywall is properly finished, you can generally proceed according to the coating system’s directions. If bare patches remain, correct them. If the entire wall looks thin and inconsistently sealed, another properly applied coat may be appropriate.
Does Dark Paint Require Two Primer Coats?
A dark final color does not automatically mean new drywall needs two primer coats. The main purpose of drywall primer remains sealing and surface uniformity. However, the primer color can affect how efficiently certain finish colors reach their intended appearance. A tinted primer may be recommended for some strong colors, depending on the paint system. Ask the paint manufacturer or retailer whether a specific primer shade is useful for your selected finish. When deciding how many coats of primer on new drywall beneath dark paint, separate the sealing question from the color-hiding question. One coat may seal the drywall perfectly, while the finish paint may still require multiple coats for full color development. Do not keep adding white primer simply because the dark topcoat looks different after its first coat. Follow the finish paint’s coverage and recoat instructions. Proper primer plus adequate finish coats generally produces a more predictable result.
What About Bright or Difficult Paint Colors?
Strong reds, deep blues, vivid yellows, and other intense colors can sometimes need special attention to achieve even visual coverage. The paint manufacturer may recommend a tinted primer or a particular base. This does not necessarily change the basic rule for bare drywall. The primer still needs to seal the substrate first. The question of how many coats of primer on new drywall should not be confused with how many finish coats a difficult color requires. After the drywall is sealed, the finish system takes over. Some colors develop their full depth only after additional topcoats. Use the recommended primer color when applicable, then apply the finish paint at the specified spread rate. Allow each coat to dry correctly. Trying to make one heavy finish coat replace two normal coats can create runs, slow drying, and uneven appearance. Thin, even applications according to the manufacturer’s directions are usually more reliable.
Do Ceilings Need the Same Primer Treatment?
New drywall ceilings also need a suitable primer before finish coating. They contain the same basic contrast between drywall paper and joint compound found on walls. In fact, ceilings can make surface irregularities especially visible because light often travels across them at a low angle. If you are asking how many coats of primer on new drywall for a ceiling, start with the same principle: one complete, properly applied coat is often sufficient when the surface is correctly prepared. Inspect it after drying. Repair visible finishing defects rather than trying to bury them under repeated primer coats. Flat ceiling paint can help reduce reflected glare compared with higher sheens, but it will not hide poor joint work completely. Use safe ladders or platforms, protect your eyes, and avoid overloading the roller. Ceiling work becomes tiring quickly, so controlled sections and proper equipment can improve both safety and finish quality.
New Drywall in Bathrooms and Humid Rooms
Bathrooms, laundry rooms, and other humid areas need careful coating choices. The drywall must be appropriate for the location, and the room needs suitable ventilation. Primer alone does not waterproof ordinary drywall. Likewise, standard painted drywall should not be treated as a substitute for approved wet-area assemblies inside showers or other locations exposed directly to water. The basic question of how many coats of primer on new drywall still depends on the chosen coating system, but moisture conditions make product selection especially important. Choose primers and finish paints approved by their manufacturers for the intended interior environment. Allow joint compounds and coatings to dry fully. High humidity can extend drying and recoat times. Bathrooms also benefit from effective exhaust ventilation because repeated condensation can challenge painted surfaces. For true wet zones, follow applicable building requirements and the instructions for the wallboard, waterproofing system, tile assembly, or other specified materials.
Can Paint-and-Primer-in-One Replace Drywall Primer?
The phrase “paint and primer in one” can create confusion. On bare new drywall, a dedicated drywall primer is generally the safer and more predictable approach unless the finish paint manufacturer specifically approves its product for direct application to that substrate. Bare drywall and joint compound are porous and benefit from sealing before finish coating. Sherwin-Williams specifically offers drywall primers for sealing new drywall and achieving a consistent finish. Therefore, when asking how many coats of primer on new drywall, do not assume a marketing phrase means the priming step can always be skipped. Read the technical information for the exact topcoat you plan to use. If it requires a primer on bare drywall, follow that requirement. A separate primer is often economical as well, since it handles the porous substrate before more expensive finish paint is applied. Product instructions should always take priority over a broad rule.
Common Primer Mistakes on New Drywall
Several mistakes can make a simple project much harder. Priming before joint compound is fully dry is one. Leaving heavy sanding dust is another. Applying the primer extremely thin to stretch coverage can also create inconsistent sealing. At the other extreme, rolling it on excessively thick can cause runs and poor drying. Homeowners sometimes misunderstand how many coats of primer on new drywall and keep adding coats to hide physical imperfections. Primer is not a replacement for sanding and repair. Another mistake is using a specialty stain-blocking product without understanding whether it is necessary. The wrong coating can add cost without solving the real problem. Finally, do not ignore temperature and humidity. Coatings need suitable conditions to dry and cure properly. Read the label, prepare the wall carefully, use suitable tools, and apply the product at its recommended spread rate. These basic steps matter more than adding unnecessary coats.
When Two Coats Are Better Than One
Although one primer coat is often enough, there are legitimate cases for applying a second. Imagine a room where large sections were repaired after the initial drywall finishing. The wall may contain different compounds, sanded areas, and patches with noticeably different porosity. After the first primer coat dries, some areas may still appear inconsistently sealed. Here, a second uniform coat may help create a better base. The same may apply when the first coat was accidentally too thin or contained missed areas. This is where the answer to how many coats of primer on new drywall becomes project-specific. Do not add the second coat automatically. Inspect first, correct actual drywall defects, and then decide. If the first coat performed properly, spending time and material on another full coat may provide little benefit. When the coating manufacturer requires a specific system, however, follow those instructions even if they differ from general practice.
How Many Finish Coats After Primer?
Primer and finish paint perform different jobs. Once the drywall is properly sealed, you still need enough finish paint to achieve the intended color, sheen, durability, and appearance. Two finish coats are a common approach for high-quality residential painting, but actual requirements depend on the paint, color, application, existing base color, and manufacturer directions. Knowing how many coats of primer on new drywall does not automatically tell you how many topcoats are required. A wall with one excellent primer coat may still need two finish coats. A dramatic color change or difficult color can sometimes require additional work. Apply each coat evenly and allow the proper recoat time. Judge the result after it has dried, because wet paint can look different. Good topcoat coverage should appear consistent from multiple viewing angles without thin spots, roller marks, or distracting sheen differences.
A Practical New Drywall Priming Process
A reliable workflow starts before the primer can is opened. First, confirm that drywall finishing is complete and fully dry. Inspect joints, corners, fasteners, and repairs. Sand smooth without damaging the paper. Remove dust thoroughly. Protect floors, trim, fixtures, and nearby surfaces. Stir the primer and apply it according to its label, maintaining consistent coverage. Let the coating dry for the required period. Then inspect the surface carefully. This simple process answers how many coats of primer on new drywall better than blindly deciding on two coats before you begin. If the first coat is uniform, sound, and properly sealed, continue with finish paint. If it exposes drywall defects, repair them and reprime affected areas. If the whole surface remains inconsistently sealed because of inadequate coverage or unusual porosity, apply another appropriate coat. Finally, use the finish paint according to its own coverage and recoat requirements.
Frequently Asked Questions
How many coats of primer on new drywall do I need?
In many normal projects, one full and even coat of a quality drywall primer is sufficient. The drywall should first be completely finished, dry, sanded smooth, and free of dust. A second coat may help if the first leaves inconsistent absorption, missed areas, extensive repairs, or inadequate coverage. Always follow the instructions for your specific primer.
Can I put paint directly on new drywall?
It is generally better to prime bare new drywall first. Drywall paper and joint compound can absorb finish paint differently. A suitable drywall primer helps seal these porous surfaces and creates a more uniform base. If a paint product claims direct-to-drywall use, verify that application in the manufacturer’s current technical instructions before skipping primer.
Is one coat of PVA primer enough for new drywall?
One properly applied coat of a suitable PVA drywall primer is commonly enough for clean, properly finished bare drywall. However, products and surfaces vary. Inspect the dried primer and follow its technical instructions. Extensive repairs, missed areas, or uneven sealing can justify additional primer.
Should primer completely hide drywall joints?
Not necessarily. Primer’s main job is not to make the wall look like the final painted surface. It should create a consistent sealed base. If a joint is visible because it is raised, scratched, poorly feathered, or physically uneven, another coat of standard primer is unlikely to fix it. Correct the drywall finishing instead.
Should I sand new drywall primer before painting?
Light sanding may help remove raised fibers, dust nibs, and minor roughness when the primer manufacturer allows it. Avoid aggressive sanding that exposes bare drywall. Remove all sanding dust before applying finish paint. Larger defects should be repaired properly instead of being sanded through the primer repeatedly.
Do I need two coats of paint after priming new drywall?
Often, two finish coats provide more consistent color and appearance, but the exact requirement depends on the paint, color, application, and manufacturer guidance. Primer does not replace finish paint. It prepares the surface, while the topcoat provides the final color, sheen, washability, and protection.
Conclusion
For most properly prepared walls, the answer to how many coats of primer on new drywall is straightforward: start with one complete, even coat of a quality drywall primer. Let it dry according to the manufacturer’s instructions and inspect the surface before doing anything else. If the wall is consistently sealed, there is usually no reason to add another coat simply out of habit. A second primer coat becomes useful when there is a clear problem, such as uneven porosity, extensive repairs, missed areas, or inadequate first-coat coverage. More primer cannot rescue poor drywall finishing. Fix ridges, scratches, pinholes, damaged paper, and other physical defects before relying on coatings. Remove sanding dust carefully and give every layer enough drying time. Then apply the required finish coats. This approach uses less unnecessary material, keeps the project efficient, and gives the final paint a smoother, more consistent surface to cover.