
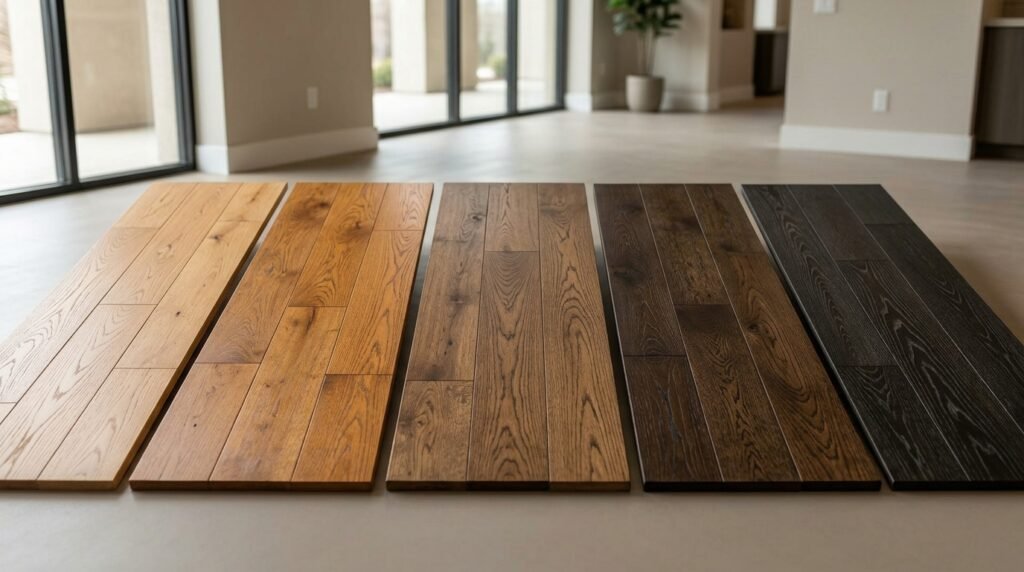
The DuraSeal stain chart is designed to help homeowners, flooring professionals, and designers compare stain colors for hardwood floors before choosing a finish. DuraSeal currently displays 36 Quick Coat colors in its official stain gallery, ranging from light neutrals and golden wood tones to classic browns, grays, rich mahogany shades, and very dark colors. Popular options include Neutral, Golden Oak, Provincial, Special Walnut, Weathered Oak, Classic Gray, Dark Walnut, Jacobean, Espresso, Ebony, and True Black. However, the small color sample seen online should never be treated as an exact prediction of a finished floor. DuraSeal itself warns that natural wood tones vary and that computer screens and printers can display colors differently. The company’s gallery demonstrates the same stain colors on both white oak and red oak, making an important point: the wood underneath the stain changes the result. Sanding, grain, board variation, preparation, lighting, application, water popping, and the clear finish can also affect how a stain looks. The most reliable way to use a DuraSeal stain chart is to narrow a large color range to a few suitable options and then test those colors on the actual flooring. This article explains the current color range, important differences between color families, how stains behave on red and white oak, and what to check before approving a final hardwood floor color.
What the DuraSeal Stain Chart Shows
The official DuraSeal stain chart provides a visual reference for the colors available in the company’s Quick Coat penetrating finish range. The current online stain gallery shows 36 colors on both white oak and red oak. These include Aged Barrel, Antique Brown, Cherry, Chestnut, Classic Gray, Coffee Brown, Colonial Maple, Country White, Dark Gray, Dark Walnut, Early American, Ebony, English Chestnut, Espresso, Fruitwood, Golden Brown, Golden Oak, Golden Pecan, Gunstock, Heritage Brown, Jacobean, Medium Brown, Neutral, Nutmeg, Provincial, Red Mahogany, Rosewood, Royal Mahogany, Rustic Beige, Sedona Red, Silvered Gray, Special Walnut, Spice Brown, True Black, Warm Gray, and Weathered Oak. Seeing the colors together makes it easier to identify broad directions before sampling. Someone looking for a traditional medium-brown floor can quickly move away from Country White, Silvered Gray, or True Black and focus on shades such as Provincial, Special Walnut, Early American, or Medium Brown. Likewise, someone seeking a pale contemporary appearance can concentrate on Neutral, Weathered Oak, Classic Gray, Rustic Beige, or related shades. The chart is therefore most useful as a comparison and shortlisting tool rather than a final color guarantee.
Why Online Stain Colors Are Only a Starting Point
A DuraSeal stain chart viewed on a phone, monitor, or printed sheet cannot reproduce every variable found on an actual hardwood floor. DuraSeal specifically cautions that screens and printers differ in the way they display colors. Monitor brightness, color calibration, room lighting, photography, and printing can all change the appearance of a swatch. The wood introduces even more variation. Hardwood is a natural material, so boards can differ in color, grain, density, mineral markings, and stain absorption. Even boards from the same species and floor can finish differently. A tiny digital swatch also lacks the scale of an entire room. A dark brown that looks balanced in a small square can feel much heavier across hundreds of square feet. A subtle gray may appear almost neutral in one image but reveal strong undertones once it covers a large floor. Use digital examples to identify colors worth testing, not to approve a final installation. Physical samples made using the same wood and preparation planned for the project provide far more useful information.
The Current Quick Coat Range Includes 36 Packaged Colors
Current DuraSeal Quick Coat literature states that the product line has 36 packaged colors, which matches the selection displayed in the official stain gallery. This is worth checking because older brochures and product sheets may contain a smaller range or different availability. Flooring products evolve, and older internet articles can continue appearing long after a manufacturer updates its collection. The current DuraSeal stain chart provides enough variation to cover many design directions without immediately requiring a custom mixture. There are natural-looking tones, golden stains, red and mahogany shades, medium browns, deep traditional colors, contemporary grays, pale neutrals, and near-black options. DuraSeal also states that Quick Coat provides more than 65 intermix options, allowing professionals to create additional colors from the packaged range. That flexibility can be useful when one standard color is close but not quite right. Still, a standard packaged shade is usually easier to document and reproduce than an informal custom mixture. Anyone selecting a custom blend should record the exact formula and approve a representative sample before the whole floor is stained.
Light and Natural Colors Keep More Wood Character Visible
The lighter side of the DuraSeal stain chart is useful when the goal is to preserve much of the natural appearance of hardwood. Neutral is one of the clearest choices for someone who wants limited color change compared with deeper brown stains. Country White moves in a much paler direction, while Golden Oak adds visible warmth without creating the weight of a dark brown floor. Weathered Oak, Rustic Beige, Classic Gray, Silvered Gray, and Warm Gray offer additional ways to soften or neutralize the wood. Light colors often allow grain patterns and natural board differences to remain more noticeable. That can be attractive because the floor still looks distinctly like real wood, but it also means the finished surface should not be expected to have the uniformity of painted material. Mineral streaks, grain variation, heartwood, sapwood, and differences between boards may remain visible. Pale colors can also react strongly to the undertone of the wood species. A light neutral on red oak may look warmer than the same stain on white oak. Sampling is especially important when trying to achieve a subtle beige, pale brown, or soft gray appearance.
Warm Browns Offer a Traditional Hardwood Appearance
Many homeowners exploring a DuraSeal stain chart are looking for a recognizable hardwood-floor brown rather than a dramatic gray, white, red, or black finish. The current range provides numerous choices in this area. Provincial, Special Walnut, Early American, Medium Brown, Antique Brown, Coffee Brown, Chestnut, Golden Brown, Spice Brown, and English Chestnut all provide different interpretations of warm or traditional wood color. They should not be selected by name alone. Provincial and Special Walnut, for example, can both belong on a shortlist for a medium traditional floor, yet they may interact differently with the wood beneath them. Golden Brown naturally points toward a warmer visual direction, while darker choices create more depth. The surrounding room matters as much as the stain sample. Cream cabinets, cool white walls, warm stone, dark furniture, and daylight can each change how the same brown is perceived. Compare sample areas next to permanent finishes that will remain after the flooring project. A stain that looks ideal in an empty room may feel noticeably warmer or darker after cabinets, furniture, and wall colors are considered.
Golden and Reddish Tones Create a Warmer Floor
Golden Oak, Golden Pecan, Fruitwood, Colonial Maple, Cherry, Sedona Red, Red Mahogany, Rosewood, and Royal Mahogany occupy warmer areas of the DuraSeal stain chart. These colors can work well in interiors that intentionally embrace warm wood rather than trying to neutralize it. They can complement traditional furniture, cream colors, warm metals, and other natural materials. However, warm stains require extra thought on naturally warm species such as red oak. The underlying pink or reddish character of the wood may strengthen the warmth of certain stains. That may be exactly the desired result, but it can also surprise someone who chose a color from a digital sample shown on different wood. Warmth should therefore be evaluated as part of the complete room rather than as a separate flooring decision. Place sample colors near cabinets, trim, doors, and fixed furniture. Check them in daylight and artificial light. If a color looks too orange, red, or yellow under the room’s actual conditions, compare a more neutral neighboring shade instead of assuming the final clear finish will completely correct the undertone.
Dark Walnut, Jacobean, Espresso, Ebony, and True Black
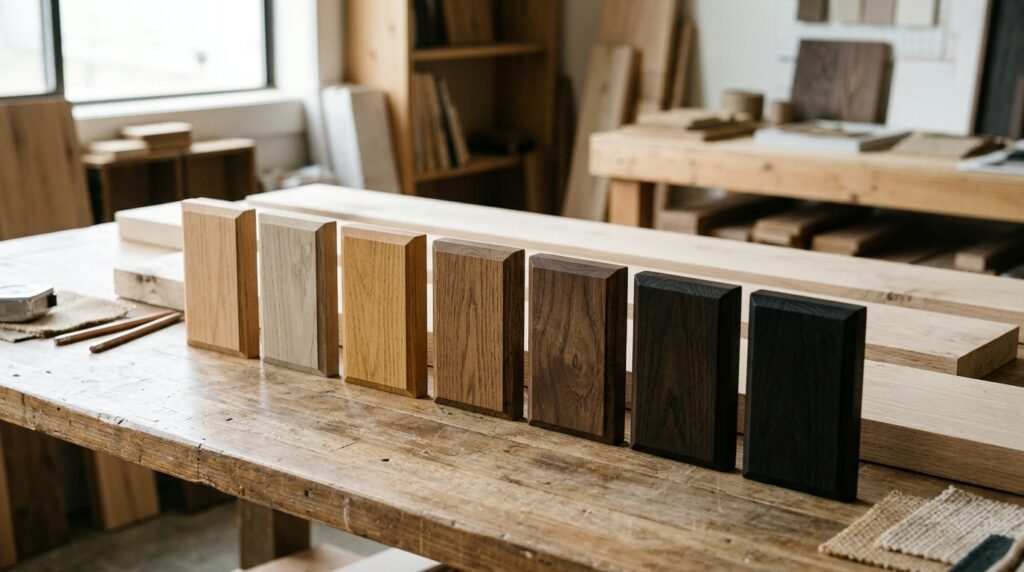
The darkest part of the DuraSeal stain chart offers several choices for creating a strong, dramatic floor. Dark Walnut is a familiar deep brown, while Jacobean provides another dark traditional option. Espresso offers a rich deep tone, and Ebony moves much closer to black. True Black is designed for an even stronger dark direction. These stains can dramatically change a room and may reduce some visible differences in the natural color of boards, but they do not turn wood into a perfectly uniform surface. Grain, density, sanding, species, and absorption can still create variation. Dark floors also have practical visual characteristics worth considering. Light-colored dust, lint, pet hair, surface marks, and certain scratches may contrast more strongly against a very dark floor. The amount of visible contrast depends on lighting, finish sheen, household conditions, and the specific stain. A small dark sample may also feel less intense than a complete room. Before approving one of these colors, view a large sample from standing height and from across the room. This gives a better sense of how much visual weight the finished floor will add.
Gray Stains Can Change Dramatically Between Wood Species
Gray is one of the areas where relying only on a DuraSeal stain chart can cause disappointment. The current range includes Classic Gray, Silvered Gray, Warm Gray, Dark Gray, Weathered Oak, Rustic Beige, and Aged Barrel, giving several ways to move away from traditional golden and reddish flooring. Yet these colors interact directly with the natural wood underneath them. A cool-looking gray applied to red oak can retain visible warmth because the wood contributes pink and red undertones. White oak can produce a more neutral or earthy result, but white oak also varies naturally from board to board. The official DuraSeal gallery is useful because it allows users to compare colors on both species. Still, those images cannot represent every floor. Lighting has another major effect. Warm artificial bulbs can make a gray floor appear more beige or brown, while cooler daylight can emphasize gray tones. Anyone choosing gray should test several nearby colors rather than approving one from its name. “Classic Gray,” “Warm Gray,” and “Dark Gray” describe general directions, but the actual floor determines how those directions translate into finished color.
Red Oak and White Oak Can Produce Different Results
The official DuraSeal stain chart showing separate red-oak and white-oak examples is especially useful because species is one of the biggest variables in stain selection. Red oak typically brings more pink, red, or warm character to the finished appearance. White oak commonly leans toward tan, brown, beige, or slightly olive tones, although no natural species is perfectly uniform. A stain does not simply sit on top of this color like opaque paint. Quick Coat is a semi-transparent penetrating finish, so the wood remains part of the visual result. This is why the same named stain can produce two recognizably different floors. Grain is also important. Oak’s strong grain structure can absorb stain differently across earlywood and latewood, creating visible contrast and character. Individual boards may also vary. Someone trying to match an online photograph must therefore identify the species used in that photograph before expecting a similar result. Even then, sanding, preparation, lighting, topcoat, and natural variation prevent an exact guarantee. Matching the sample process to the actual project is much more reliable than matching an internet image.
Test the Finalists Directly on the Floor
After using the DuraSeal stain chart to narrow the range, make representative samples on the flooring that will actually be finished. This is one of the most valuable steps in the entire selection process. A separate sample board of the same species can help, but the installed floor gives better context because it shows real board variation, room lighting, nearby cabinets, trim, walls, and architectural features. Sample areas should be prepared consistently with the planned final sanding process. Otherwise, differences in surface preparation may distort the comparison. Limit the test to a manageable group of serious candidates. Testing twenty colors next to one another can make the decision harder rather than easier. Three to five well-chosen options usually provide a clearer comparison. View them from normal standing height rather than examining only the grain from close range. Look from different sides of the room and at several times of day. Artificial evening lighting can make the same sample appear noticeably different from its appearance beside a bright window at midday.
Sanding Quality Has a Direct Effect on Stain
Even the perfect color from a DuraSeal stain chart cannot compensate for poor floor preparation. Penetrating stain interacts with the wood surface, so sanding scratches, inconsistent sanding, contamination, edge-sanding differences, and uneven preparation can become more visible after staining. DuraSeal’s troubleshooting information identifies sanding and application issues among factors that can contribute to uneven staining. A floor should therefore be prepared using proper hardwood-floor sanding methods before stain is applied. Consistency matters across the main floor and along walls or corners where different machines may be used. Deep scratches can absorb pigment differently or become emphasized by dark stain. Areas sanded to a different condition may also accept color differently. This becomes especially noticeable with strong dark colors or difficult combinations of wood and stain. DIY refinishing can save labor costs, but sanding errors may require a complete re-sand to correct. Anyone without experience using floor sanding equipment should consider whether professional refinishing is more sensible, particularly on valuable hardwood. The stain color and sanding process should be planned as one system rather than two unrelated decisions.
Water Popping Can Make Samples Look Different
Water popping is another reason an online DuraSeal stain chart may not exactly match a sample prepared at home. The process involves applying water evenly to properly prepared wood so the grain is raised before stain application. This can affect how the floor accepts stain and can produce a deeper or different appearance than the same stain applied without that preparation. DuraSeal’s pre-packaged stain literature notes that floors shown in some official imagery were water popped before finishing. That detail matters because someone trying to reproduce a photograph without using the same preparation method may see a different result. Water popping must also be done consistently. Uneven application can create uneven stain absorption and visible differences. The key principle is not that every floor must be water popped. It is that the approved sample should represent the process intended for the entire floor. If a flooring contractor plans to water pop the project, the sample should be water popped too. If the floor will not receive that preparation, comparing it with a differently prepared sample can create unrealistic expectations.
Quick Coat Is a Penetrating Hardwood Floor Finish
The colors displayed on the DuraSeal stain chart are associated with DuraSeal Quick Coat Penetrating Finish. DuraSeal describes Quick Coat as a product formulated to color and seal hardwood flooring, and the company’s materials position it primarily for professional floor finishing. Current literature lists 36 packaged colors and more than 65 intermix options. The product is semi-transparent, which explains why wood species and natural grain remain important after staining. DuraSeal also states that Quick Coat can be used with its water-based and oil-based finish systems according to product guidance. This is important because stain is only one stage of a finished hardwood-floor system. The surface must still receive an appropriate protective finish. Homeowners choosing a color can benefit from discussing the complete system with their flooring professional instead of considering stain alone. Ask which preparation method will be used, which Quick Coat color or mixture will be applied, what finish will go over it, what sheen is planned, and how the approved sample represents the final process. Documenting these details can reduce misunderstandings once work begins.
Drying Conditions Matter Before the Topcoat Goes On
DuraSeal describes Quick Coat as a two-hour penetrating finish, but that number must be understood in context. Manufacturer literature lists the two-hour dry time under specified conditions of 77°F and 50 percent relative humidity. The same technical information gives a working temperature range of 50°F to 90°F with humidity below 80 percent. DuraSeal’s troubleshooting guidance further explains that temperature, humidity, airflow, and coverage rate can influence drying. This means the finishing schedule should respond to actual job-site conditions rather than treating two hours as an unconditional deadline. Cold temperatures or high humidity can slow drying. Excess material can also create problems. The manufacturer emphasizes proper coverage and application rather than assuming more stain produces a better result. Once a color from the DuraSeal stain chart has been approved, application should follow the current product label and technical information. Rushing the next stage because a fixed amount of time has passed can be a poor decision if the stain has not dried appropriately under the actual conditions. Professional judgment and manufacturer guidance should control the process.
Custom Mixing Expands the Available Color Range
A homeowner who cannot find the exact desired shade on the DuraSeal stain chart may have another option. DuraSeal states that its 36 packaged Quick Coat colors can provide more than 65 intermix possibilities. Professional mixing can create a shade between two standard colors or adjust warmth, darkness, or neutrality for a specific project. For example, a standard brown may be close to the intended appearance but slightly too dark or too warm. A controlled blend can sometimes provide a better balance. Custom color should never become an undocumented experiment, however. The exact products and mixing ratio should be recorded so additional material can be prepared consistently. This becomes particularly important if the project requires several containers or if repairs are needed later. A custom formula also needs its own test area because mixing two familiar colors does not guarantee an obvious midpoint once they interact with the wood. Approve the mixture on the actual floor using the same preparation process planned for the installation. Keeping a written formula and photographs of the approved sample can also provide a useful reference for future maintenance or repair work.
The Protective Finish Can Change How the Stain Reads
A DuraSeal stain chart focuses attention on color, but the stain is not the final visible layer of a finished hardwood floor. A protective clear finish is normally applied over the stained surface, and the complete finishing system influences the final appearance. Sheen is particularly noticeable. A flatter surface reflects light differently from satin, semi-gloss, or gloss, which can change the way depth, grain, dust, and surface marks are perceived. Some finishing systems may also influence warmth or clarity. For that reason, the most useful color sample is one that represents not only the selected stain but also the planned clear finish whenever practical. DuraSeal offers water-based finishing products designed to work with Quick Coat, and its resources provide separate information for different finish systems. A homeowner should not assume that stain alone determines the finished look. Discuss the topcoat and sheen before approving the project. A dark stain under a reflective finish can create a different visual effect from the same color beneath a lower-sheen surface. The combination should support the room’s design and expected level of use.
Match the Floor to Permanent Features, Not Temporary Trends
A DuraSeal stain chart contains enough fashionable and traditional options to make trend-driven selection tempting, but hardwood flooring usually remains in place much longer than paint, rugs, or decorative accessories. Permanent or expensive features should therefore have greater influence on the stain decision. Kitchen cabinets, built-in woodwork, stone countertops, fireplace materials, doors, stairs, and major architectural finishes are useful reference points. If these elements are warm, an extremely cool gray floor may create a contrast that was not obvious when viewing the stain alone. If a home contains many dark permanent finishes, a very dark floor can make the room feel visually heavier. Natural light also matters. A color that looks balanced in a bright showroom may appear much deeper in a room with small windows. Rather than asking which stain is currently most popular, ask which one works with the materials that are likely to remain. Trends can still provide inspiration, but the final choice should make sense within the actual home. This approach usually produces a more cohesive result and reduces the pressure to refinish again simply because decorative fashions change.
Common Mistakes When Choosing a DuraSeal Stain
One of the biggest mistakes with a DuraSeal stain chart is choosing directly from a digital swatch and expecting the finished floor to match it exactly. Another is ignoring wood species. Red oak and white oak can make the same stain look different, which is why DuraSeal provides separate gallery examples for both. Choosing by stain name alone can also cause problems. Names such as Espresso, Weathered Oak, Special Walnut, or Classic Gray suggest a general visual direction but cannot communicate every undertone. Tiny samples are another issue because they fail to show enough board variation or the visual weight of a color across a large room. Poor preparation can then create an entirely separate problem even after the correct color is chosen. Inconsistent sanding, wiping, water popping, or application may produce uneven results. Finally, homeowners sometimes compare a raw stain sample with an internet photograph of a completely finished floor without considering the topcoat, sheen, lighting, photography, or preparation used in the reference image. A representative on-floor sample remains the strongest defense against these mistakes.
How to Make the Final Color Decision
The most practical way to use a DuraSeal stain chart is to make decisions in stages. First decide on the broad direction: natural, golden, warm brown, red or mahogany, gray or weathered, deep brown, or near-black. Next, select a small group of packaged colors within that family. Compare official red-oak or white-oak examples according to the species in the home. Then make representative samples on the actual floor using the intended sanding and preparation method. If water popping is planned, include it in the sample process. View the samples during different lighting conditions and compare them with cabinets, walls, trim, stone, and other permanent materials. Narrow the selection to the color that works best across the whole room rather than the one that looks most impressive from close range. Finally, document the exact stain name or custom mixing formula, preparation method, topcoat system, and sheen before work begins. This method takes more effort than pointing at an online swatch, but it greatly reduces uncertainty and gives both the homeowner and flooring professional a clearer reference for the finished result.
Conclusion
The DuraSeal stain chart is most useful as a decision tool rather than an exact preview of a finished hardwood floor. Its current 36-color Quick Coat range provides options from Neutral, Country White, and Golden Oak through classic choices such as Provincial and Special Walnut to deeper colors including Dark Walnut, Jacobean, Espresso, Ebony, and True Black. Gray and weathered choices add another direction for more muted interiors. Yet the name or online swatch is only part of the decision. Red oak, white oak, natural board variation, sanding, water popping, lighting, stain application, topcoat, and sheen can all influence the finished appearance. Start with the official DuraSeal stain chart to narrow the range, but make the final decision from properly prepared samples on the actual floor whenever possible. Compare those samples with the permanent materials in the room and inspect them under several lighting conditions. If a custom mixture is used, document the formula carefully. A little extra work before staining is far easier than correcting an entire floor after the wrong color has been applied.


