
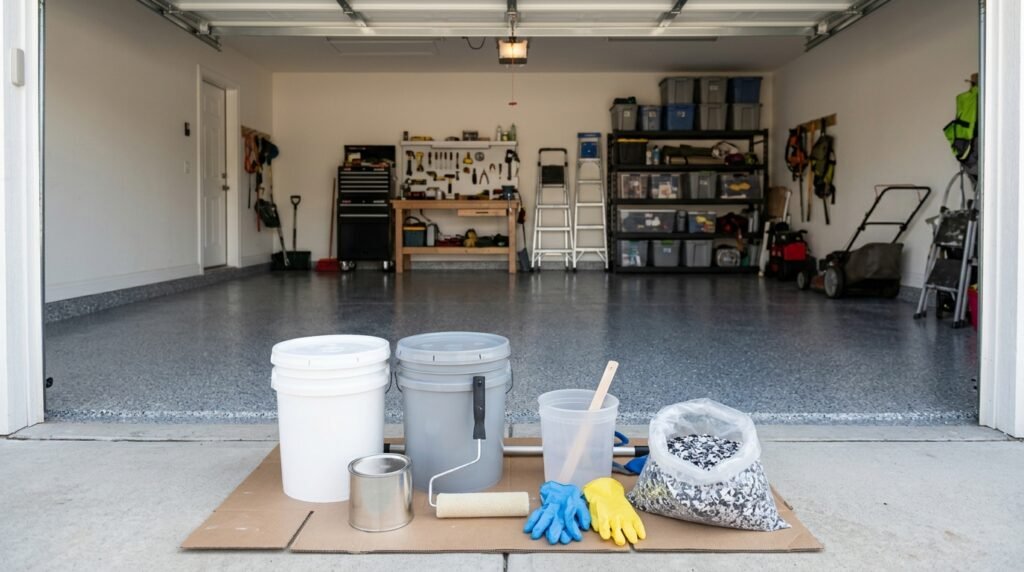
An epoxy garage floor coating kit can give bare concrete a cleaner, more finished surface while improving resistance to everyday stains, tire traffic, and normal garage use. The kit itself, however, does not guarantee a durable floor. Concrete condition, moisture, cleaning, surface preparation, mixing, application temperature, coverage, and curing all affect the final result. For most homeowners, the best kit is not simply the thickest or most expensive option. It is one that matches the condition of the concrete and the way the garage is used. True two-component epoxy systems normally combine resin with a hardener shortly before application. Some retail products use different resin technologies while still being marketed for garage floors, so the product label and technical data matter. Before buying anything, measure the floor, inspect it for coatings and contamination, look for moisture or damage, and read the complete installation instructions. This guide explains what garage coating kits contain, how they differ, what preparation they require, and how to avoid the mistakes that commonly lead to peeling or an uneven finish.
What Is an Epoxy Garage Floor Coating Kit?
An epoxy garage floor coating kit is a packaged system designed to make coating a concrete garage easier than purchasing every component separately. A typical two-part system contains resin and hardener. Some kits also provide decorative color flakes, concrete preparation material, or other accessories. The contents vary widely, so never assume two boxes with similar marketing language contain equivalent systems. One kit may provide only the main coating, while another may be part of a larger system that uses a separate primer or clear topcoat. Product chemistry also matters. A true two-component epoxy begins a chemical reaction when its components are mixed, which means the mixed material has a limited working period. Ready-to-use products labeled as one-part epoxy or epoxy-fortified coatings work differently and should be evaluated according to their own technical instructions. Rather than buying based only on the word “epoxy,” check how many components the product has, which surfaces it accepts, how the concrete must be prepared, and whether additional products are recommended.
Decide What Performance You Actually Need
Before comparing kits, decide how demanding your garage will be. A garage used mainly for parking passenger vehicles has different needs from a workshop where tools, jacks, chemicals, and heavy equipment are frequently moved. A decorative floor in a lightly used garage may not require the same system as a working garage exposed to frequent abrasion. When choosing an epoxy garage floor coating kit, consider vehicle traffic, direct sunlight near the door, water exposure, road salt in cold climates, automotive fluids, cleaning habits, and the likelihood of impact damage. Also decide what appearance you want. Solid colors provide a clean, simple finish. Decorative flakes create visual texture and can make small dirt and surface variation less obvious. A clear topcoat may be part of some systems, but it should be specifically compatible with the base coating. Avoid building a homemade system from unrelated products unless their manufacturers confirm compatibility. Performance comes from the complete system, not from one impressive claim printed on the package.
Inspect the Concrete Before Buying the Kit
Concrete should be evaluated before you spend money on coatings. Look for oil stains, grease, tire marks, old paint, sealers, curing compounds, cracks, spalling, dusting concrete, efflorescence, and signs of persistent moisture. If water beads strongly on bare concrete, a sealer or another treatment may be present. An epoxy garage floor coating kit cannot correct a weak or contaminated substrate simply by covering it. Existing coatings also require careful attention. A new layer can appear to bond well to old paint while the old paint itself remains poorly attached to the concrete. If that lower layer fails, both coatings can lift together. Significant cracks, movement, moisture intrusion, or deteriorated concrete may require repair or professional evaluation before coating. New concrete may also need to cure for a specified period before application. Some current consumer coating manufacturers require about 30 days for new concrete, but the exact requirement for your project must come from the product you actually purchase. Inspect first, then select the system.
Measure the Garage and Understand Coverage
Coverage claims are useful only when they match your floor and application. Measure the garage rather than estimating it from labels such as one-car or two-car garage. Multiply the usable length by width and account for additional concrete areas you intend to coat. Then check the manufacturer’s stated coverage for the exact epoxy garage floor coating kit. Surface texture and porosity can affect how far material goes. Rough or highly porous concrete can consume more coating than a smoother prepared slab. Do not intentionally stretch a kit beyond its stated coverage to avoid buying another package. A coating applied too thinly may have uneven color, incomplete hiding, or performance that differs from the intended film build. If multiple kits are required, check the manufacturer’s instructions for combining batches or maintaining color consistency. Decorative systems may also need enough flakes or topcoat for the entire area. Calculate the project before mixing begins because running out of material halfway through a floor can leave visible transitions that are difficult to correct.
Surface Preparation Matters More Than Decorative Features
The most attractive flakes and gloss cannot compensate for poor adhesion. Concrete must normally be clean, sound, dry enough for the coating, free of contaminants, and prepared to the profile required by the manufacturer. The International Concrete Repair Institute uses Concrete Surface Profile, or CSP, benchmarks to describe concrete roughness for coatings and other bonded materials. The appropriate profile depends on the system being installed. Consumer manufacturers may instead describe the required surface using simpler comparisons or specify their own preparation process. Follow the exact epoxy garage floor coating kit instructions rather than assuming every epoxy needs identical preparation. Cleaning alone is not necessarily profiling. A floor can look spotless while remaining too smooth or sealed for the coating. Preparation methods can include mechanical grinding, shot blasting, or chemical etching where specifically allowed. Each method has limitations and safety considerations. The goal is not to make the concrete extremely rough. It is to create the clean, sound, suitably profiled surface required by that coating system.
Grinding and Etching Are Not Interchangeable for Every Product
DIY guides often present grinding and acid etching as two interchangeable ways to prepare any garage. That is too broad. Some consumer manufacturers specifically instruct homeowners to clean and etch uncoated concrete for particular products. Professional resinous flooring systems commonly use mechanical preparation to create a specified surface profile. An epoxy garage floor coating kit should therefore determine the preparation method rather than the other way around. Grinding can remove weak surface material and create a mechanical profile, but it produces significant dust unless suitable extraction equipment is used. It also requires care around edges and existing damage. Chemical etching involves handling reactive products, careful rinsing, and following all label instructions. It may not solve every contamination or coating problem. Never combine chemicals or improvise neutralizing procedures. Wear the protective equipment required by the product. After any wet preparation, the concrete must reach the moisture condition required by the coating before application. If you cannot confidently prepare the slab correctly, professional mechanical preparation may be worth considering.
Remove Oil and Garage Contaminants Thoroughly
Oil contamination deserves more attention than a quick wipe. Automotive fluids can penetrate porous concrete, and coating over contaminated areas may lead to localized adhesion problems. Before applying an epoxy garage floor coating kit, remove loose debris and clean oil or grease using methods compatible with the coating manufacturer’s preparation instructions. Heavily contaminated areas may require repeated treatment. Cleaning residue must also be removed because replacing oil contamination with detergent residue does not create a good bonding surface. Do not judge cleanliness only by stain color. Some discoloration can remain after cleaning, while contamination may still exist in concrete that looks relatively normal. Water behavior can sometimes provide clues, but use the tests and preparation standards recommended by the coating manufacturer. If oil has soaked deeply into the slab for years, a simple consumer kit may not be the best starting point. Mechanical removal, specialized treatment, or professional assessment may be necessary before investing in the finish.
Check for Moisture Before Coating Concrete
Concrete can contain or transmit moisture without looking visibly wet. Coating a slab with an unresolved moisture problem can contribute to blistering, delamination, or other failures, depending on the system and conditions. Before using an epoxy garage floor coating kit, look for damp areas, white mineral deposits, dark patches, recurring moisture, or previous coating failure. Then follow the manufacturer’s required moisture-evaluation procedure. Different coating systems have different tolerances and testing requirements. A simple taped plastic sheet may be mentioned by some consumer instructions as a screening method, while professional projects may use more formal moisture testing. Do not assume a dry-looking surface proves the entire slab is suitable. Also investigate the source of recurring water. Exterior drainage, plumbing, groundwater conditions, or moisture vapor through the slab can require different solutions. A decorative coating should not be used to hide an active moisture problem. If testing shows conditions outside the coating’s acceptable limits, identify the cause and determine whether mitigation or a different flooring system is needed.
Repair Cracks Without Assuming Epoxy Will Hide Them
Small cracks are common in concrete, but they are not all the same. Some are stable shrinkage cracks, while others may reflect ongoing movement, settlement, or another structural condition. An epoxy garage floor coating kit is not a structural repair system simply because epoxy resin is strong. Evaluate cracks before filling them. Use repair materials compatible with the coating and follow their cure and preparation requirements. Control and expansion joints deserve separate consideration because they may be intended to accommodate movement. Filling every joint rigidly for a seamless appearance can create future problems if movement continues. Areas with vertical displacement, widening cracks, significant settlement, recurring water entry, or extensive deterioration should be evaluated before cosmetic work begins. After repairs cure, the surface may need additional profiling to create a consistent coating base. The final floor may still reveal repaired cracks under certain lighting or as the building moves. A realistic goal is a sound, well-prepared substrate, not the permanent elimination of every sign that the floor is concrete.
Understand What Comes in the Box
Read the complete contents list before beginning preparation. Depending on the epoxy garage floor coating kit, the package may include separate resin and activator components, decorative flakes, preparation products, instructions, or other materials. Rollers, extension poles, brushes, buckets, mixing equipment, cleaning products, repair compounds, protective equipment, and traction additives may need to be purchased separately. Some systems also call for a compatible primer or topcoat that is not included in the main kit. Knowing this before project day prevents rushed substitutions. Also confirm how the components are packaged. Some kits divide materials into smaller batches, while others require mixing a larger quantity at once. Never assume that half of each container can be estimated visually for a partial batch. Two-component materials require the specified ratio. If partial mixing is permitted, measure components using the method stated by the manufacturer. If it is not permitted, mix the complete unit. Organize all tools and materials before activating the coating because working time starts once reactive components are combined.
Pot Life and Working Time Can Make or Break the Project
Two-component epoxy does not remain usable indefinitely after mixing. The available working period, often called pot life or working time, varies by formulation and environmental conditions. Once an epoxy garage floor coating kit has been activated, delaying while you sweep, repair an edge, search for a roller, or open decorative flakes wastes valuable application time. Complete those tasks first. Read the mixing instructions several times before starting. Follow the required mixing duration, equipment, component ratio, and any induction period stated by the manufacturer. Do not add extra hardener in an attempt to accelerate curing or add unapproved thinner to extend working time. The chemical proportions are designed for that product. Temperature can also influence how quickly reactive coatings become difficult to apply. Have enough help for the project size. One person can cut edges while another rolls if the instructions and layout make that practical. Plan an exit route so the final section ends at the garage opening rather than trapping the installer behind wet coating.
Temperature and Weather Affect Application
The garage may be indoors, but the slab still responds to outdoor conditions. Concrete can remain cold after the air warms, and an open garage door can expose the coating to humidity, wind, dust, or rapid temperature changes. Every epoxy garage floor coating kit has its own acceptable application conditions. Check the required air and surface temperatures and any humidity or dew-point limitations provided by the manufacturer. Do not use a generic temperature range from another product. Cold conditions may slow curing, while heat can shorten working time for some reactive systems. Condensation on the slab can also interfere with application. Plan the entire project window, including preparation, drying, coating, recoating, and curing. A favorable afternoon is not enough if overnight conditions fall outside the product’s requirements. Keep leaves, insects, dust, and windblown debris away from wet coating. If the garage needs ventilation during installation, follow the coating’s safety instructions while preventing contamination of the wet surface as much as practical.
How to Apply an Epoxy Garage Floor Coating Kit
Application should begin only after the floor passes the preparation requirements. Organize the garage into manageable sections. Cut in edges where required, then roll or spread the coating using the tools specified for the system. Maintain the recommended coverage and work method. When using an epoxy garage floor coating kit, avoid pouring large random pools of material onto the slab unless the instructions specifically direct that technique. Uneven distribution can produce inconsistent thickness. Work systematically toward the garage opening and maintain appropriate wet edges. If decorative flakes are included, broadcast them while the receiving coat remains in the condition specified by the manufacturer. Try to distribute flakes consistently rather than throwing large handfuls into isolated areas. Good lighting helps reveal missed spots and uneven coverage. Keep loose hair, dust, insects, and debris away from the wet floor. If the system requires another coat or a clear finish, follow the stated recoat window. Applying the next layer too early or too late can create problems.
Decorative Flakes Change More Than Appearance
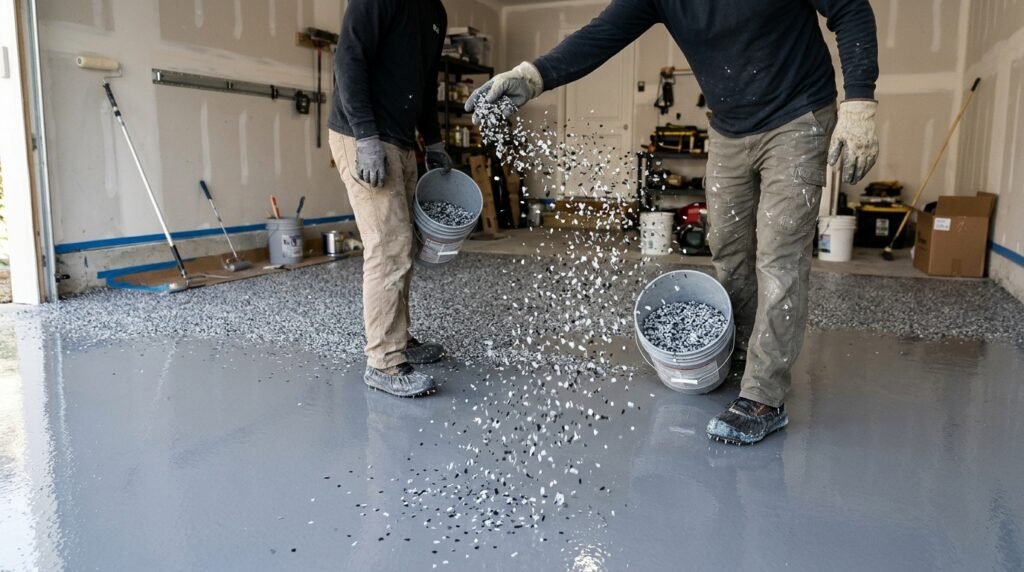
Color flakes can make a garage look more finished and help disguise small variations, dust, and everyday marks. They can be applied lightly for a scattered effect or more heavily in systems designed for dense broadcast. The exact method depends on the epoxy garage floor coating kit. Practice the throwing motion before working over wet coating. Broadcasting upward can allow flakes to fall more naturally than throwing them directly at one spot, but always follow the product’s method. Decorative flakes should not be confused with traction aggregate. A flake floor may have more visual texture, yet that does not automatically provide the slip resistance needed for every environment. If traction is important, determine whether the system accepts a compatible anti-slip additive. Also consider maintenance. A highly textured surface can be more difficult to mop than a smoother finish. Choose the amount of texture based on how the garage is used, not simply how dramatic the sample looks.
Consider Slip Resistance Before the Floor Is Finished
Garage floors can become wet from rain, vehicle tires, washing, or automotive fluids. Smooth coated surfaces may become slippery under those conditions. If the epoxy garage floor coating kit allows a compatible anti-slip additive, consider whether it makes sense for your household. Use only materials approved for the system. Random sand or other aggregate can affect appearance, application, and cleaning and may not perform as expected. The amount and size of texture influence both traction and maintenance. A heavily textured surface can hold dirt and make mopping harder, while a very smooth glossy finish may be easier to clean but less forgiving when wet. Entry areas and locations where people step out of vehicles deserve particular thought. No texture eliminates the need to clean spills promptly. Oil, soap, and other contaminants can make even textured floors hazardous. Slip resistance is therefore a system and maintenance issue rather than a feature that can be solved with one decorative ingredient.
Do You Need a Clear Topcoat?
A clear coat can add another protective layer, change gloss, encapsulate decorative flakes, or provide other performance characteristics when it is part of a compatible system. However, not every epoxy garage floor coating kit requires one. Follow the manufacturer’s system recommendations instead of automatically adding a clear product. Compatibility is critical. A topcoat must bond properly to the base coat and should be installed within the required recoat window or after the specified surface preparation. Some homeowners choose alternative resin technologies as topcoats for properties such as UV resistance or abrasion performance, but these advantages are formulation-specific. Do not assume any polyurethane, polyaspartic, or clear epoxy can be placed over any garage coating. If you want a topcoat that was not included in the original kit, check the manufacturer’s written technical information first. Also remember that additional gloss can make surface defects and debris more visible. More layers do not automatically mean better performance when those layers were never designed to work together.
Cure Time Is More Important Than When the Floor Feels Dry
A coating can feel dry long before it reaches the condition required for vehicle traffic. Manufacturers may provide separate times for recoating, light foot traffic, replacing heavier objects, and parking vehicles. For example, current and historical consumer garage-floor instructions show that traffic times can differ significantly between products and are affected by conditions. That is why an epoxy garage floor coating kit should always be cured according to its own instructions. Do not use a friend’s project as your timer. Temperature and humidity can change actual curing behavior. Avoid dragging storage cabinets, rolling heavy equipment, or parking vehicles before the stated period. Tire contact places different demands on a coating than careful foot traffic. If you need the garage for daily parking, plan another parking location before starting. Recoat windows matter as well. If you miss the maximum window for a second layer, the manufacturer may require additional preparation. Read the full schedule before beginning so the project does not conflict with work, weather, or vehicle needs.
Why DIY Epoxy Garage Floors Peel
Peeling is often blamed on the coating when the real cause began before application. Contaminated concrete, old sealers, weak previous paint, insufficient profiling, dust, moisture, poor mixing, incorrect environmental conditions, and premature traffic can all contribute to failure. When an epoxy garage floor coating kit starts lifting, the location of the failure can provide useful clues. Peeling around oily parking areas suggests a different issue from widespread failure across the entire slab. If the coating comes off with an older paint layer attached underneath, the original coating may have been the weak link. Blisters or recurring areas of delamination may justify investigating moisture. Do not simply roll another layer over a failing surface. Remove loose material and determine why it failed. A repair that addresses only the visible edge may continue peeling later. Proper troubleshooting can save more time than repeatedly patching the same area.
DIY Kit vs Professional Garage Floor System
A DIY kit makes sense when the concrete is relatively sound, preparation is manageable, and you are comfortable following time-sensitive instructions. Professional installation becomes more attractive when the slab has severe oil contamination, questionable moisture, extensive cracking, failing coatings, or difficult preparation. A professional system may also use specialized grinding or shot-blasting equipment and multiple coating layers. This does not mean every professional installation is automatically superior to every epoxy garage floor coating kit. Quality still depends on preparation, materials, and workmanship. When comparing a contractor with DIY, ask for the exact coating products and preparation method. Find out how cracks and joints will be treated, whether moisture will be evaluated, what layers will be installed, and when the floor can return to service. Compare systems rather than marketing terms such as “industrial grade.” If the DIY project requires renting equipment, purchasing several repair materials, and correcting difficult substrate problems, professional installation may offer better value than the kit price initially suggests.
How to Compare Kits Before Buying
Ignore the front of the package for a moment and read the technical information. First, determine whether the product is a true two-component epoxy or another type of garage coating. Check approved substrates, preparation requirements, coverage, application conditions, working time, recoat schedule, cure schedule, and recommended accessories. Then see what the epoxy garage floor coating kit actually includes. Decorative flakes can be convenient, but they should not distract from the coating’s suitability for your floor. Look for clear instructions about previously painted concrete, moisture, oil contamination, and new concrete. If you expect strong sunlight at the garage entrance, investigate how the complete system handles UV exposure. If you want a clear coat or anti-slip texture, confirm compatible products before purchasing. Finally, calculate how many kits the floor needs based on measured area and stated coverage. A cheaper box is not cheaper if inadequate coverage forces a rushed second purchase or if the system does not match the slab.
Cleaning and Maintaining the Finished Floor
Once fully cured, routine care helps preserve the finish. Sweep or vacuum grit because abrasive debris can be dragged under tires and equipment. Clean spills promptly using products compatible with the coating. Avoid assuming that every strong solvent or degreaser is safe simply because epoxy has a reputation for chemical resistance. Resistance varies by formulation and chemical exposure. An epoxy garage floor coating kit manufacturer may provide specific cleaning recommendations, so keep the technical information after installation. Use protective pads where sharp metal equipment or heavy objects could damage the finish. Lift rather than drag heavy cabinets when practical. Inspect high-traffic areas and locations beneath vehicle tires for wear or damage. If a chip or peeling area appears, determine the cause before repairing it. Maintenance also includes keeping water, road salt, and automotive residue from remaining on the floor unnecessarily. A coating reduces some maintenance challenges, but it does not make concrete flooring immune to impact, abrasion, contamination, or substrate movement.
Common Mistakes to Avoid
The first mistake is buying a kit before evaluating the concrete. The second is underestimating preparation. Other common problems include coating over oil, ignoring moisture, stretching coverage, mixing components incorrectly, applying outside the required temperature range, distributing flakes unevenly, and returning vehicles too soon. Another mistake is assuming every epoxy garage floor coating kit can be upgraded with any clear coat or anti-slip additive. Coating systems need compatible components. Do not substitute chemicals, primers, thinners, or repair materials without checking instructions. Avoid mixing an entire kit before the floor and tools are ready. Do not leave grinding dust behind after spending hours profiling the slab. If old paint is peeling, remove unsound material instead of treating it as a stable foundation. Finally, do not expect the coating to repair structural movement, stop active water problems, or turn deteriorated concrete into a sound slab. Correct substrate problems first. The finish should be the last stage of the project, not a way to hide unresolved conditions.
Frequently Asked Questions
Is an epoxy garage floor coating kit worth it?
It can be a practical choice for a sound concrete garage when the floor is prepared correctly and the system suits the expected traffic. Its value depends more on preparation and product suitability than decorative features. A difficult or damaged slab may make professional installation more sensible.
How many epoxy kits do I need for a two-car garage?
Measure the actual floor area and compare it with the exact manufacturer’s coverage rate. Do not rely only on labels such as “two-car garage.” Roughness, porosity, system design, and the number of coats can affect the amount of material required.
Do I have to grind concrete before applying epoxy?
Not universally. Some products specify chemical etching or another preparation method, while professional systems often use mechanical profiling. Follow the exact coating manufacturer’s instructions. Grinding should not be treated as mandatory for every product, and etching should not be assumed acceptable for every system.
Can I put epoxy over an existing painted garage floor?
Possibly, but the existing coating must be sound and compatible with the new system. Loose or peeling material should not become the foundation for a new coating. Follow the new product’s instructions for testing, cleaning, abrading, priming, or removing existing coatings.
How long before I can park on a newly coated garage floor?
Use the vehicle-traffic cure time stated for the exact product. It may be much longer than the time required for light foot traffic. Temperature and humidity can also influence curing. Parking too early can damage a coating that appears dry on the surface.
Can an epoxy kit fix cracked or damaged concrete?
No coating should be treated as a substitute for proper concrete repair. Stable cracks may be repairable with compatible materials before coating. Moving cracks, settlement, significant spalling, moisture intrusion, or structural concerns should be evaluated before installing the floor system.
Conclusion
Choosing an epoxy garage floor coating kit should begin with the concrete rather than the color shown on the box. Inspect the slab for moisture, contamination, old coatings, cracks, and weak areas. Measure the garage accurately and select a system whose coverage, preparation requirements, application conditions, and cure schedule fit the project. Then give surface preparation the attention it deserves. Clean thoroughly, create the required profile, repair suitable defects, and remove all preparation residue. Once application begins, follow the specified mix ratio, working time, coverage, recoat window, and curing instructions without improvising. Decorative flakes and clear coats can create an attractive finish, but only when they are compatible with the complete system. If the slab has serious moisture, movement, deterioration, or deeply embedded contamination, professional assessment may be more valuable than forcing a DIY solution. A garage coating lasts because the whole system works together, from the concrete underneath to the final cured layer.