A whole house repipe means replacing the water supply pipes throughout a home, rather than repairing only one leaking or damaged section. It is usually considered when plumbing pipes have widespread corrosion, repeated leaks, poor water flow, or other age-related problems. The project may involve replacing hot- and cold-water lines, reconnecting fixtures, testing the new system, and repairing access openings in walls or ceilings. The best approach depends on the existing pipe material, home layout, water conditions, and local plumbing requirements. A whole house repipe can help address repeated pipe failures, but it is not automatically necessary whenever one pipe leaks. A professional assessment should first identify the cause of the problem and determine how much of the system needs replacement. This article explains common warning signs, pipe materials, installation stages, cost factors, and ways to prepare for the work.
What Is a Whole House Repipe?
A whole house repipe is a plumbing project that replaces most or all of the water supply piping inside a residential property. These pipes carry water from the main supply connection to fixtures such as sinks, showers, bathtubs, toilets, washing machines, and water heaters. The work generally focuses on the hot- and cold-water distribution system. It does not automatically include drain, waste, and vent pipes, which carry wastewater away from the home. Those systems have different functions and may need separate inspection or replacement. The exact scope also varies by property. Some projects replace all accessible interior supply lines, while others include the incoming service pipe or specific connections. A plumber should clearly explain which pipes are included before work begins. This distinction matters because homeowners sometimes assume that a full repipe covers every pipe in the building. A written project description helps prevent confusion and makes it easier to compare estimates.
Why Do Homes Need New Water Pipes?
Water pipes can deteriorate because of age, corrosion, poor installation, unsuitable materials, water chemistry, physical damage, or repeated pressure stress. Some older plumbing materials may become brittle or corroded over time. Metal pipes can develop internal buildup or corrosion that affects water flow. Plastic piping can also fail if it was damaged, installed incorrectly, or exposed to conditions outside its approved use. A single leak does not always mean the entire system has reached the end of its useful life. However, repeated leaks in different areas can suggest a wider problem. A whole house repipe may become a sensible option when repairs are frequent, pipe condition is poor, or the existing material is no longer suitable. The plumber should look beyond the visible leak and assess the rest of the system. Replacing one short section without investigating the wider condition may leave other weak areas in service.
Signs That Your Home May Need Repiping
Several warning signs can indicate that the water supply system needs closer inspection. Frequent leaks are one of the clearest reasons to investigate, especially when they occur in separate rooms or different pipe runs. Rust-colored or discolored water may point to corrosion or disturbance inside the plumbing, although water supply problems outside the home can also cause discoloration. Low water pressure throughout the property may be linked to restricted or damaged pipes, but it can also result from a faulty pressure regulator, a partially closed valve, or a municipal supply issue. Other signs include visible corrosion, green or blue staining around copper fittings, recurring damp patches, unexplained water damage, and unusual pipe noises. These symptoms do not prove that a full replacement is required. A qualified plumber should identify the source before recommending major work. If water is leaking near electrical equipment, keep clear and arrange urgent professional help.
Repeated Leaks and Hidden Water Damage
A leak in one accessible pipe may be a simple repair. Several leaks across different parts of the home are more concerning because they can indicate widespread deterioration or a system-wide issue. Small leaks behind walls, under floors, or above ceilings may remain hidden until they cause stains, damaged finishes, mould growth, or changes in flooring. A sudden rise in the water bill can also justify checking for a hidden leak, particularly when household water use has not changed. However, a higher bill alone does not identify the cause. Toilets, outdoor taps, irrigation systems, and other fixtures can also waste water. A plumber may use pressure checks, visual inspection, or suitable leak-detection methods to narrow down the problem. If several pipe sections are failing because of the same material or condition, repairing each leak separately may become less practical than replacing the affected network.
Low Water Pressure and Discolored Water
Low pressure can make showers weak, taps slow, and appliances take longer to fill. If the problem affects only one fixture, the cause may be a clogged aerator, showerhead, valve, or local pipe section. If several fixtures are affected, the plumber should inspect the wider supply system. Internal corrosion and mineral deposits can reduce the space available for water to flow through older metal pipes. Yet low pressure can also come from the street supply, a pressure-reducing valve, a faulty shutoff valve, or a leak. Discolored water needs similar care. Brown or rusty water may be associated with iron corrosion or disturbed sediment, but the source could be the public water network rather than the home’s internal pipes. If discoloration continues, contact the water supplier and arrange appropriate testing or plumbing inspection. Do not assume that replacing interior pipes will solve a water-quality problem caused by the service line or public main.
Pipe Materials Commonly Used for Repiping
The most common choices for residential water supply replacement include PEX, copper, and CPVC, where local codes permit them. Each material has different installation methods, joining systems, temperature limits, and performance characteristics. PEX is flexible and can often be routed through building spaces with fewer fittings along a run. Copper is a rigid metal pipe with a long history of use in water distribution systems. CPVC is a plastic piping material designed for approved hot- and cold-water applications. The correct option depends on local regulations, the water conditions, building layout, product approvals, and the plumber’s design. A whole house repipe should not be planned around price alone. The pipe, fittings, valves, and joining method must form a compatible system. Product instructions and local plumbing rules should guide the final specification.
PEX Piping
PEX is short for cross-linked polyethylene. It is a flexible plastic tubing used in approved hot- and cold-water distribution systems. Its flexibility can make it easier to route through walls, floors, ceilings, and other building spaces. Longer continuous runs may reduce the number of concealed joints, depending on the layout and installation method. PEX is available in different types and joining systems, so fittings and tools must match the specific product. The tubing also needs suitable support and protection where it passes through framing, near sharp edges, or through fire-rated assemblies. Exposure to sunlight and other environmental conditions must remain within the manufacturer’s limits. PEX is not a single universal product with identical ratings across all brands. Temperature, pressure, connection methods, and installation details vary. The Plastics Pipe Institute’s PEX design guide provides technical information for designers and installers, including material properties, system layouts, fittings, and installation practices. A plumber should use approved components from a compatible system rather than mixing parts without confirmation.
Copper Piping
Copper is a rigid metal material used in domestic water distribution. It is available in different tube types and sizes, and the correct specification depends on the application and local plumbing rules. Copper can be a suitable choice where its properties and installation requirements match the building. It is joined using approved methods, which may include soldering or mechanical fittings designed for the tube and system. Installation requires accurate cutting, preparation, support, and correct jointing. Copper can be affected by water chemistry, corrosion conditions, and installation quality. Some homes have experienced pinhole leaks in copper piping, so replacing it with the same material without investigating the cause may not prevent future problems. The Copper Tube Handbook explains that pipe sizing must consider available pressure, fixture demand, friction losses, elevation, and flow velocity. These factors show why pipe selection is a design task, not just a matter of choosing a material.
CPVC Piping
CPVC stands for chlorinated polyvinyl chloride. It is a plastic pipe material used in approved hot- and cold-water plumbing systems. CPVC is rigid, so changes in direction generally require fittings rather than bending the pipe like flexible tubing. The system uses compatible fittings and a joining method specified by the manufacturer. Pipe, fittings, primer, and cement must be suitable for the intended application and follow the product instructions. Incorrect preparation, unsuitable joining materials, or movement during joint setting can lead to leaks. CPVC also has temperature and pressure limits that must be respected. It may not be accepted for every building or jurisdiction, so the plumber should confirm local approval before specifying it. Homeowners should ask which CPVC system is being installed and whether all components are approved for potable water use. A reliable estimate should identify the product and joining method rather than simply listing the word plastic.
PEX vs. Copper vs. CPVC: How to Compare Them
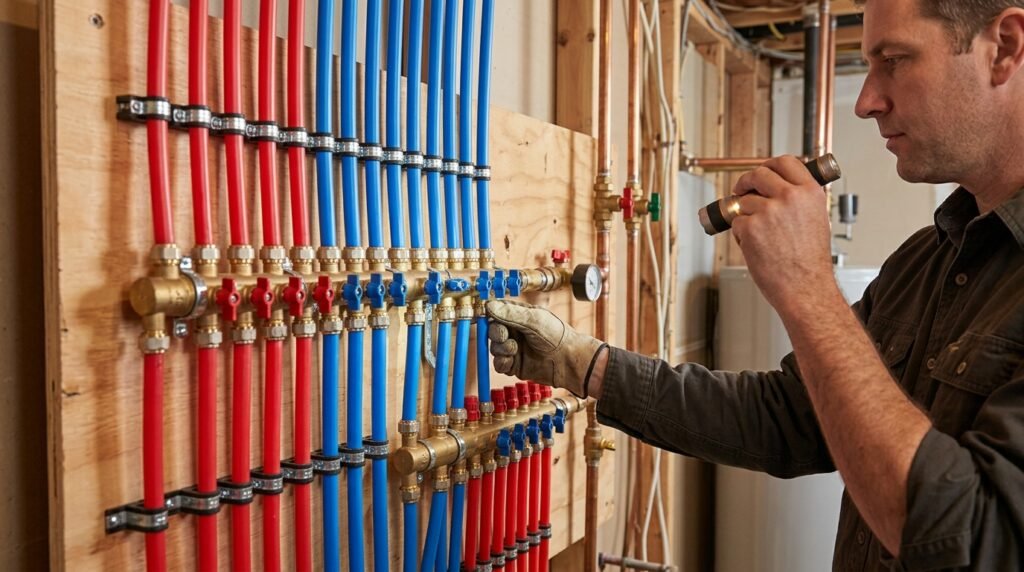
There is no single pipe material that is best for every home. PEX may suit layouts where flexible routing and fewer concealed joints are useful. Copper may suit projects where a rigid metal system is preferred and local water conditions support its use. CPVC may be an option where its approved temperature, pressure, and installation requirements match the property. Compare the full installed system, not only the price per metre or foot. Ask about fittings, valves, access needs, insulation, protection, and the availability of replacement parts. Consider the water chemistry and whether the old system failed because of corrosion, pressure, or another cause. A material change will not correct an excessive water-pressure problem by itself. The plumber should also explain how the chosen pipes will be supported, protected, and connected to existing fixtures and equipment. A useful quotation describes the system in enough detail for another qualified professional to understand what is being proposed.
What Does a Whole House Repipe Include?
The scope usually covers the new hot- and cold-water distribution lines serving the home’s fixtures. It may include new shutoff valves, connections to the water heater, fixture supply connections, and changes to the main distribution arrangement. Some projects also replace the main shutoff valve or parts of the incoming water service line, but these items should never be assumed. The contractor may need to open selected sections of drywall, ceilings, cabinets, or flooring to reach existing pipes. After installation, the new system should be tested and inspected as required before access openings are closed. Wall and ceiling repairs may be included in the plumbing quote or handled by a separate finishing contractor. Fixtures themselves may remain in place if they are in good condition and compatible with the new connections. Ask for a written list of included and excluded work. This is one of the simplest ways to avoid disagreements once the project is underway.
How a Whole House Repipe Is Planned
Planning begins with an inspection of the existing plumbing. The plumber identifies pipe materials, visible damage, fixture locations, water heater connections, shutoff valves, and accessible pipe routes. The layout of the home also matters. A single-storey property with accessible attic or crawlspace areas may present different challenges from a multi-storey home with finished ceilings and limited access. The contractor should discuss where new pipes can run and where openings may be needed. The plan should also address water pressure, pipe sizing, hot-water delivery, insulation, and protection from physical damage. The number of bathrooms and fixtures affects the system’s demand. A good design aims to provide suitable flow while meeting the applicable plumbing code. Before accepting the work, homeowners should receive a clear scope, material specification, expected schedule, payment terms, and information about inspections and repairs to finishes.
What Happens During the Installation?
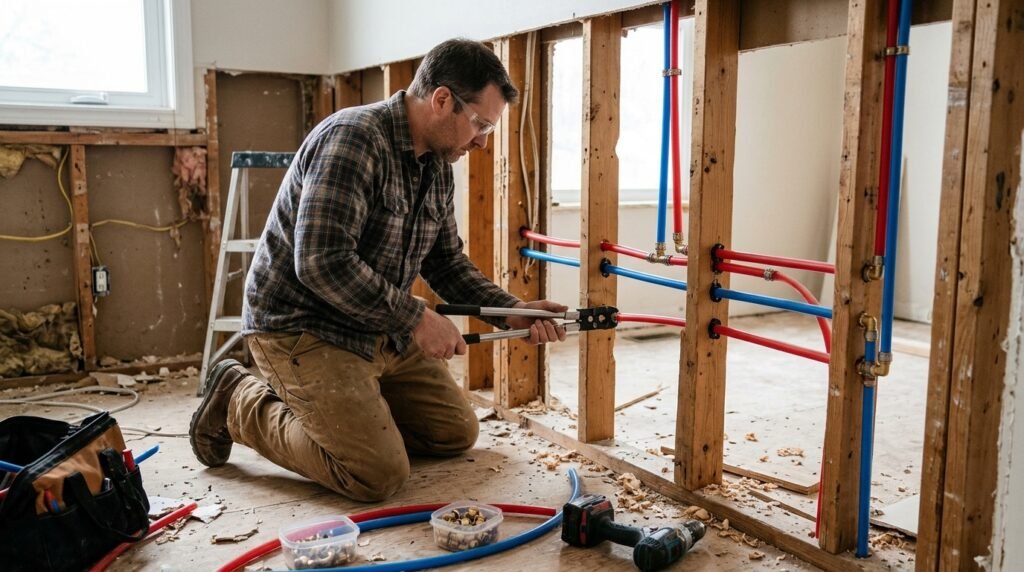
The exact sequence depends on the building and piping system, but most projects follow a planned series of stages. First, the work area is protected, and the water supply is shut off when necessary. The plumber creates access to the old pipes and installs the new routes according to the approved plan. New hot- and cold-water lines are connected to the appropriate fixtures and equipment. The old pipes may be removed, disconnected, or left safely isolated where removal would cause unnecessary damage and the design permits it. The new system is then tested for leaks and checked for correct operation. Required inspections should take place before concealed work is covered. After approval and testing, access openings can be repaired by the responsible contractor. The team should run the fixtures and check for leaks, flow problems, and hot-water delivery. Homeowners should receive an explanation of the new shutoff locations and any maintenance requirements.
How Long Does Repiping Take?
The project duration depends on the size and layout of the home, the number of fixtures, pipe access, material choice, and the amount of repair work required. A small, accessible property may take less time than a large home with several bathrooms, multiple floors, and finished surfaces. Difficult access can add significant work. For example, routing new pipes through an open attic may be simpler than opening tiled walls or concrete floors. Inspection schedules and the availability of other trades can also affect completion. Ask the contractor for a realistic schedule that separates plumbing installation from wall, ceiling, tile, and painting repairs. Clarify when water will be unavailable and whether the home can remain occupied during each stage. Do not rely on a fixed number of days quoted without a property inspection. A useful estimate explains the assumptions behind the schedule and identifies factors that could cause delays.
What Happens to Walls, Floors, and Ceilings?
Access is often one of the most noticeable parts of a repiping project. Plumbers may need to make openings in drywall, ceilings, cabinets, or other finished areas to reach existing pipes and install new routes. The number and size of openings depend on the building structure and available access paths. Some homes allow much of the work to be routed through an attic, crawlspace, basement, or utility area. Others require more openings inside living spaces. The contractor should explain how access points will be selected and whether patching is included. Plumbing work and finish restoration are different trades, so a quote may cover only the pipe installation. If tile, stone, custom cabinetry, or decorative finishes must be removed, repair may require specialist work. Take photographs of important areas before work begins and move fragile items away from the work zone. Agree in writing who will repair each opening.
Water Shutoff and Living in the Home During Work
A repipe usually requires the water supply to be turned off during parts of the installation. The length and timing of each shutdown depend on the work plan. Some contractors complete the project in stages so water can be restored between major tasks, while others may need a longer continuous shutdown. Ask how the schedule will affect toilets, showers, cooking, laundry, and drinking water. Make a practical plan for drinking water and basic washing before work starts. If the household includes people who need regular access to water, discuss this with the contractor in advance. Pets and children should be kept away from open walls, tools, materials, and work areas. If the home has a water-dependent appliance or special equipment, ask whether it needs to be disconnected or protected. Clear communication about daily access can make the project easier to manage.
Testing and Inspection After Installation
Testing is essential because new pipes and joints must be checked before walls or ceilings are closed. The plumber should follow the testing method required for the selected piping system, product instructions, and local code. Do not assume that every material can be tested in the same way. For example, the PEX installation guidance directs installers to consult the relevant product manufacturer and local officials for applicable requirements. The contractor should explain what test was performed and whether an inspection is required. Once the system is approved for use, each fixture should be operated and checked for leaks, suitable flow, and correct hot- and cold-water connections. The water heater should also be checked after reconnection. If water quality is a concern, ask whether flushing or laboratory testing is appropriate. Keep the final inspection record, product information, and contractor documentation with the home’s maintenance records.
Common Repiping Mistakes to Avoid
One common mistake is replacing pipes without identifying why the original system failed. If high water pressure, unsuitable water conditions, or poor installation caused repeated damage, a new pipe material alone may not solve the problem. Another mistake is accepting a vague quote that does not list materials, pipe routes, valves, testing, permits, and finish repairs. Using incompatible fittings or joining products can also create problems. Pipe sizing should not be guessed from the old pipe alone because the new layout and fixture demand may differ. Poor support, sharp edges, unprotected penetrations, and unsuitable exposure can damage piping over time. Homeowners should also avoid closing access openings before the required testing and inspection are complete. Finally, do not choose a contractor only because the initial price is the lowest. A detailed scope, proper licensing where required, suitable insurance, and clear workmanship terms matter when replacing a system hidden behind finished surfaces.
Water Pressure and Pipe Sizing Matter
A new plumbing system should be designed to meet the home’s water demand without creating unnecessary pressure loss or excessive flow velocity. Pipe sizing depends on factors such as available supply pressure, the number and type of fixtures, elevation, pipe length, fittings, and friction losses. A larger pipe is not automatically the right answer, and copying the old pipe sizes may not suit a redesigned layout. Excessive water pressure can stress pipes, fittings, valves, and appliances. Low pressure can make fixtures perform poorly. The plumber should measure or assess the incoming pressure and check whether a pressure-reducing device is needed under local requirements. If the supply pressure is outside the acceptable range for the installed system, the issue should be addressed as part of the project. A whole house repipe is an opportunity to correct design problems, but the result depends on proper calculations and installation.
Lead Pipes and Drinking Water Safety
Older plumbing may contain lead pipes, lead solder, or fixtures with lead-containing components. Lead can enter drinking water when materials containing lead corrode. The US Environmental Protection Agency explains that lead pipes, faucets, and fixtures are common sources of lead in drinking water. It also notes that water testing is the way to determine whether harmful levels are present. Replacing interior household pipes does not necessarily remove a lead service line that connects the property to the public water main. That line may be owned or maintained by the utility, the property owner, or both, depending on local arrangements. If lead is suspected, contact the water supplier and a qualified plumbing professional to identify the materials and arrange appropriate testing. Do not rely on water appearance, taste, or smell to rule out lead. Local drinking-water rules differ, so use the guidance of the relevant water authority and public health agency.
Permits, Plumbing Codes, and Professional Requirements
Repiping can involve altering or replacing a regulated plumbing system. Permit and inspection requirements depend on the local authority and the scope of work. In some places, replacing a short section may be treated differently from changing the full distribution system. The International Code Council explains that plumbing permits and inspections are used to check regulated work against the adopted code, but the exact rules depend on the jurisdiction. Homeowners should ask who will obtain any required permit and arrange inspections. A contractor should be willing to explain the applicable requirements and provide documentation when needed. Do not assume that a permit is unnecessary because the pipes will be hidden after installation. Local rules may also specify approved pipe materials, fittings, water-pressure controls, insulation, backflow protection, and testing. If the home is in a historic building, condominium, or shared property, additional approvals may apply.
How Much Does a Whole House Repipe Cost?
The cost depends on the home’s size, number of fixtures, number of floors, pipe material, accessibility, and amount of finish repair. A property with open access may require less demolition than one with tiled bathrooms, finished ceilings, or pipes buried in concrete. The choice between PEX, copper, or another approved material can also affect material and labour costs. Additional work may include replacing shutoff valves, correcting pressure issues, updating water heater connections, obtaining permits, and repairing walls or ceilings. There is no reliable single price that applies to every home or region. Local labour rates and material availability also change the estimate. Request a written quotation after an on-site inspection. It should identify the pipe material and size, the areas being replaced, the number of fixture connections, testing, permits, cleanup, and finish restoration. Compare quotes with the same scope rather than comparing only the final totals.
How to Choose a Qualified Repipe Contractor
Choose a contractor who can explain the existing plumbing problem and the proposed solution in clear terms. Ask about relevant licensing, registration, insurance, and experience under the rules in your area. Request a written scope that names the pipe material, fitting system, work areas, testing method, inspection arrangements, and repair responsibilities. Ask how the contractor plans to route the new lines and protect them from damage. It is also useful to ask who will handle drywall, tile, painting, and cabinet repairs. A good contractor should explain what is excluded and how unexpected problems will be priced. Check references or reviews, but look for details about communication, cleanliness, testing, and follow-up rather than relying only on star ratings. Before work begins, agree on the payment schedule, project timetable, change-order process, and documentation you will receive when the job is complete.
How to Prepare Your Home for Repiping
Preparation can reduce delays and protect belongings. Clear access to sinks, water heaters, utility spaces, crawlspace entries, attic hatches, and other planned work areas. Move fragile items, valuables, and furniture away from areas where walls or ceilings may be opened. Remove items from bathroom and kitchen cabinets if the contractor needs access behind them. Keep pets and children away from tools and open work areas. Discuss parking, rubbish removal, work hours, and access to electrical outlets with the crew. Store drinking water before the planned shutdown and make arrangements for household members who need special support. Photograph finished surfaces and discuss how openings will be repaired. If the home has alarms, automatic water devices, or appliances connected to the plumbing, ask whether they need temporary adjustment. A short preparation meeting with the contractor can clarify these details and prevent avoidable disruption.
Maintenance After the New Pipes Are Installed
New pipes still need normal care. Learn where the main shutoff valve and individual fixture valves are located. Keep access to these valves clear so water can be isolated quickly if a fixture or appliance leaks. Check visible pipe areas from time to time for moisture, movement, or signs of damage. Avoid hanging heavy items from pipes or using them as supports. Do not drill into walls or floors without checking where water lines may run. If future renovation work is planned, share the plumbing layout with the builder before cutting or fastening into walls. Follow the manufacturer’s guidance for the installed pipe system and connected equipment. If water pressure changes suddenly, a leak appears, or fixtures begin to behave differently, arrange an inspection rather than assuming the new system cannot develop a problem. Keep the installation records and any product warranties in a safe place.
Frequently Asked Questions
1. How do I know if I need a whole house repipe?
Repeated leaks in different areas, widespread corrosion, persistent low pressure, and visible pipe deterioration can indicate that the system needs a full assessment. One isolated leak does not automatically require complete replacement. A plumber should inspect the existing pipes, identify the cause, and explain whether targeted repairs or a broader repipe make more sense.
2. Does a whole house repipe include drain pipes?
Usually, the term refers to hot- and cold-water supply pipes. Drain, waste, and vent pipes carry wastewater away and are a separate part of the plumbing system. They may need inspection or replacement, but this work should be listed separately in the project scope.
3. Is PEX better than copper for repiping?
Neither material is best for every property. PEX is flexible and can simplify some routing layouts, while copper is a rigid metal system with established plumbing uses. Water conditions, local code, installation quality, product approvals, and project design should guide the decision.
4. Will I have to leave my home during a repipe?
Not always. Some households remain at home while work is completed in stages, but access, noise, dust, and water shutdowns can make daily routines difficult. Ask the contractor how long water will be unavailable and whether any stage requires the property to be vacant.
5. Can new pipes improve low water pressure?
They can help if restricted or damaged supply pipes are causing the problem. However, low pressure may also come from the public supply, a valve, a pressure regulator, or a leak. The cause should be identified before replacing pipes, or the same problem may remain.
6. How long does a whole house repipe last?
There is no single lifespan that applies to every piping system. Service life depends on the material, product quality, water conditions, installation, operating pressure, and maintenance. Follow manufacturer guidance and have unusual leaks, corrosion, or pressure changes checked promptly.
A Better Plumbing System Starts With a Proper Assessment
A whole house repipe can be a practical solution when water supply pipes are failing across several parts of a home. It can replace deteriorated lines and provide a chance to improve pipe routing, fixture connections, and pressure control. However, full replacement is not always the right response to one isolated leak. The condition of the existing system, the reason for failure, and the layout of the property should guide the decision. PEX, copper, and CPVC each have uses and limitations, so material selection should follow the plumbing design and local requirements. Before approving the work, request a clear written scope, confirm testing and inspection arrangements, and understand who will repair finished surfaces. A careful assessment and properly planned installation can help create a reliable water supply system and reduce avoidable problems later.